Get Started
Company
Copyright © 2022. Logaholic Web Analytics BV
Before we start its important that your Windows Server 2012 R2 is up to date. It should have the latest updates and patches that Microsoft has released. Some of the required Microsoft components will fail to install if your server is not up to date.
When your server is setup right, has the latest updates and running as it should we advise you to use Microsoft Web Platform Installer http://www.microsoft.com/web/downloads/platform.aspx to setup Php and MySql. For this article we installed Php 5.6.31 and MySql 5.7.19 but you should be fine with the other versions as well that are listed with Microsoft Web Platform Installer 5.0.
Before you start we advise you to install Fast CGI, this is included in your Windows server however not installed by default.
So go to your Windows Explorer, select Computer from the top menu and then select uninstall or change a program. Next select turn Windows features on or off. Add Roles and Features Wizard starts up. Select in left pane Server Roles, under Roles open Webserver IIS, open Web Server, Open Application development and select CGI, click next and complete the wizard.
When done you should see a Fast Cgi icon appear in your IIS UI home pane when you select a site in the left pane of IIS UI.
Find some documentation here:
https://docs.microsoft.com/en-us/iis/configuration/system.webserver/fastcgi/#setup
Now go to http://www.microsoft.com/web/downloads/platform.aspx and install Microsoft Web Platform installer or run it if you already installed it before.
Search for Php, when you select Php 5.6 the installer will automatically select an additional 3 components please install all 4 by following on screen instructions. After the wizard is done you may want to check that PHP installed as expected.
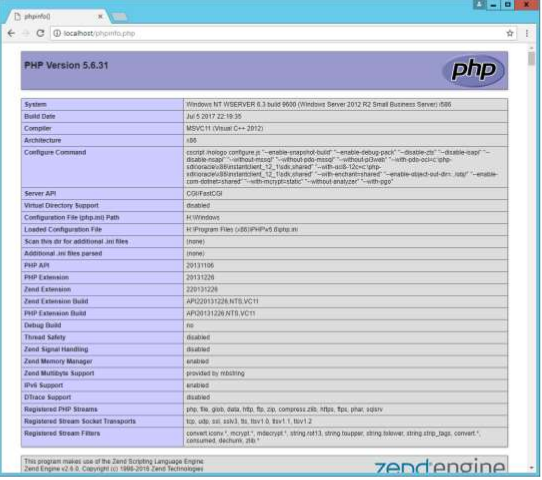
To test your PHP installation
A webpage like below should load, showing current PHP settings.

Next open your Microsoft Web Platform installer again, search for MySql select and install it. We could have done this in 1 go with Php but I think its better to do this separate. Follow the on screen instructions when the MySql installer runs. MySql proposes to install Microsoft Visual Studio C+++ dependent on your platform 32/64bit this could be 3 ? 5 additional redistributables.
Click execute when MySql installer offers to find and install MsVs, obviously when MsVs is already installed on your server you can just click install. When MsVs is successfully installed click install and complete the MySql installation.
Reboot your Server.
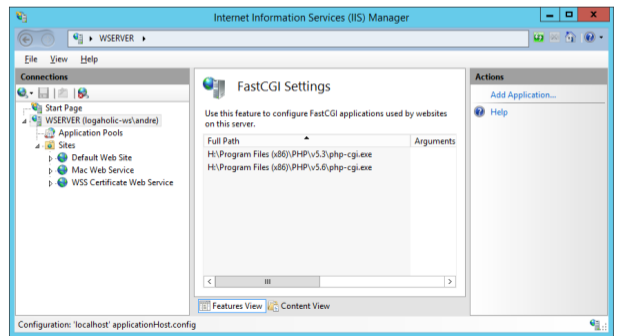
When your server is back up again Open IIS in the left pane click your server. In the home pane under IIS you should see a Fast CGI settings icon. Double click this Icon. This should reveal the absolute path to your Php installation. See below picture. Remember this youll will need this later.

Download Logaholic latest version www.logaholic.com/download. Un pack the downloaded file. You will find a folder called Logaholic. Copy the folder Logaholic and paste it in the root of your website in our case we followed the default installation layout of the Windows server 2012 R2.
Logaholic was pasted in the folder wwwroot C:\inetpub\wwwroot\logaholic\
Now open a browser on your server and go to http://localhost/Logaholic/install.php Logaholic’s installation procedure will load in your browser.
Please follow these instructions http://www.logaholic.com/manual/installation/set-up-wizard/
When you have submitted all requested data in the setup screen Logaholic will check if your php settings and folder permission are correctly set up. Most likely Logaholic will report on some php settings that have to be corrected. Locate the php.ini file in the PHP directory with highest version number, you had revealed the path earlier in the Fast Cgi component see above. Open php.ini in a text editor in administrator mode. Correct the reported settings. Find some more information here:
http://www.logaholic.com/manual/installation/php-settings/
Click Recheck in Logaholic’s installation wizard to see if the Php settings pass.
Most likely you will see in the Installation wizard that Logaholic reports it cannot write to the Folders Data, Files and Temp. This can be kind of a challenge to correct under IIS.
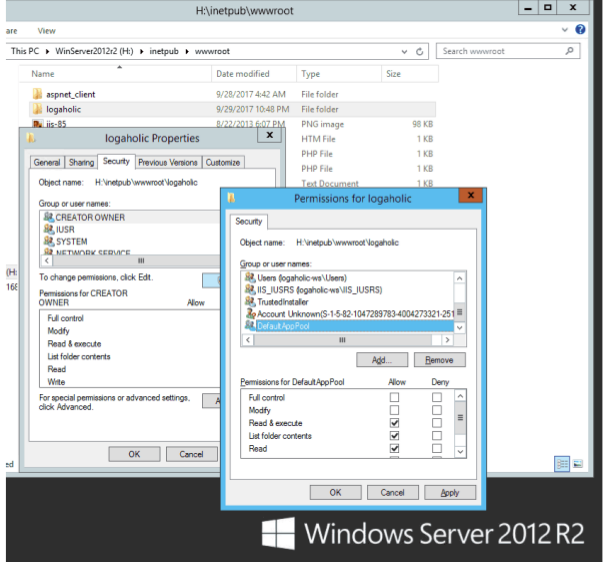
Applications that run under IIS require an account that has sufficient permissions. You wont be able to find this account for security reasons this account is hidden. The account name is derived from the website names and application pools that are running under IIS on your server. Our server still has default settings and names so the account we have to give sufficient permissions for writing to the folder Data, Files and Temp is called DefaultAppPool and is its a member of the IIS APPPOOL group.
To set the appropriate permission:
Select (in Windows Explorer) the properties of the Logaholic directory.
(C:\inetpub\wwwroot\logaholic\)
Choose the Security Tab, click Edit and then click Add.
Click locations, select server name and click ok. For “Enter the object names to select”, enter: IIS APPPOOL\DefaultAppPool
Then 3X ok.
(DefaultAppPool is the default account name, if your website has another name then default then use different name replace DefaultAppPool for different name)
Now set writing permissions for DefaultAppPool on the Logaholic folder.
Go to IIS UI Connections pane select Logaholic, double click Authentications Icon, edit Anonymous Authentication, set to Application Pool identity.
Now you should be able to complete the setup of Logaholic.
For more information see https://technet.microsoft.com/en-us/library/hh994613(v=ws.11).aspx
Now that you have successfully setup Logaholic go back to Windows Explorer :
Select properties of C:\inetpub\wwwroot\logaholic\ remove writing permissions for DefaultAppPool
Go to C:\inetpub\wwwroot\logaholic\data\ add writing permissions for DefaultAppPool.
Go to C:\inetpub\wwwroot\logaholic\files\ add writing permissions for DefaultAppPool.

Next you can go ahead and configure necessary profiles in Logaholic for more information see: http://www.logaholic.com/manual/profile-configuration/
Logaholic enables you to track visitors through Web server log files and/or through the included java tracker. Should you decide to use your web server log files to track visitors you will have to allow “read” permissions to the above mentioned DefaultAppPool for the folder where your log files reside. By default IIS 8.5 on Windows server 2012 R2 stores logfiles in C:\inetpub\logs\LogFiles\W3SVC1\. Allow DefaultAppPool write permissions as follows:
Right click folder “W3SVC1”, choose properties, choose the Security Tab, click Edit, Under user names/groups choose “DefaultAppPool”, under Permissions for DefaultAppPool tick “read” and save.
You will find more information on the above mentioned tracking methods here.